Adding a Custom Tab Navigator at the Top Using React Native
Want a better UX for your next app, you should definitely try a different type of navigation system. When talking about app navigation panels, you can either build them in the bottom panel or tap panel. Here, in this blog, we will learn about adding a tab navigator at the top panel. For this, we will consider the React Native framework. So, if you want to learn more about this functionality, you need to stay with me till the end. Also, you can get assistance from the developers of reliable React Native app development company.
Before we get into the steps, let us get an insight into the app customization.
Define app customization
App customization is the method of personalizing an app and its interface with different features, colors, font style, graphics, and other elements. You may be wondering why we need to customize our app. We need to customize our app because every user has different needs. They want their app to be different from others. So to attain this criterion and provide a better customer experience, you need to adopt the best practices of app customization.
With React Native and its components, these criteria can be achieved easily.
Let’s see how we can customize our top tab navigator. Let’s start with the prerequisites criteria.
React Native environment setup
Note that, if you already have the software required for the React Native project-building process in your system, you can skip this step and move forward with the second step.
If you have not, you have to download Node, JDK, Android Studio, VS Code editor, and React Native CLI.
As we have considered the React Native CLI as the development tool, we have to download the mentioned software.
However, if you want to go with the Expo CLI tool, you have to download the Expo Go app on your mobile. In this case, you may not need to get Android Studio.
For the detailed process, check the linked article.
Configuring the app for the project
You need a template or a space where you can store your codebase and distribute it later. This can be referred to as a temple. It is a folder that you have to create in your local system.
For this, make a new folder in your local folder and run the cmd.
As you open the command terminal, run npx react-native init Tabnavigator –version 0.68.1. It will create the template folder inside the folder that you initially selected.
This is the important step that you need to undertake before installing a third-party package and creating the codebase.
Third-party library installation
Working in a react native project needs components from relevant libraries. React Native framework supports a wide range of components. You can import it from the native libraries or third-party libraries. However, taking components from third-party libraries requires their installation and linking them with the project.
For the current project, you will need @react-navigation/material-top-tabs and @react-navigation/native.
You can install it by running commands but first, create a new terminal in your code editor. Make sure that it is from your project. Then, to install @react-navigation/native, pass npm i @react-navigation/native on the terminal, and for @react-navigation/material-top-tabs, pass npm i @react-navigation/material-top-tabs on the same terminal.
Now, the coding segment. You have to design code for five files.
First, build three screens namely Home, About, and Setting. Following this, work on the Material.js and App.js files.
The Home Screen
Create a new ‘Component’ folder in your template folder and add a new file named ‘Home.js’ in it.
Code snippet for the Home.js file is shown below.

Image 1
The code gets all the React Native components from the native libraries and creates the main container with an image source and some styling parameters. The width and height are set as 100%.
The About Screen
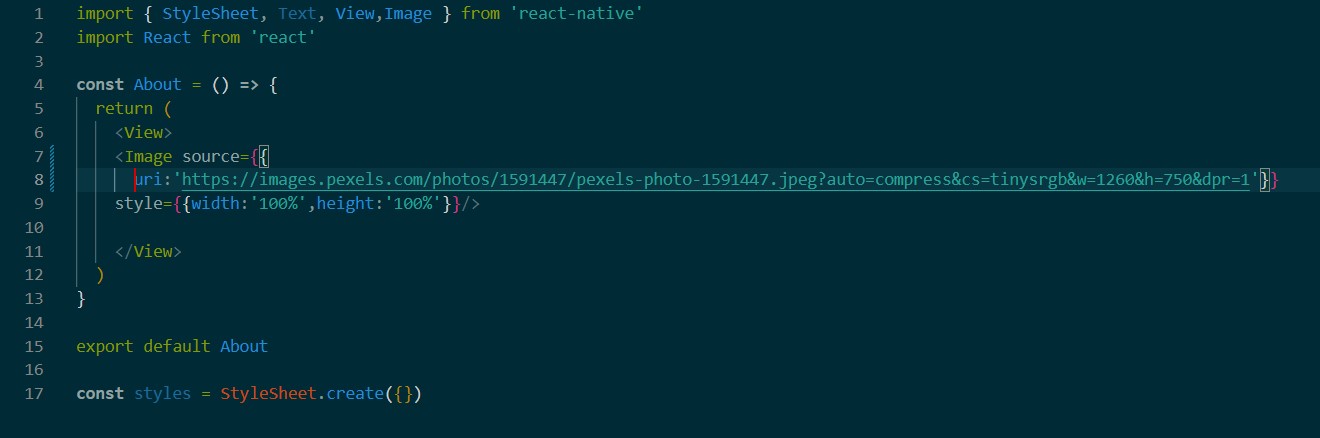
Image 2
This is another screen that users can navigate to using the top tab navigation bar. You simply need to copy the code from the Home.js file and paste it into the About.js file.
Note that you have to create this file under the ‘Component’ folder.
However, change the source of the image and substitute the term ‘Home’ with ‘About’. As you are building the About screen, you cannot use the same ‘Home’ component.
The Setting screen
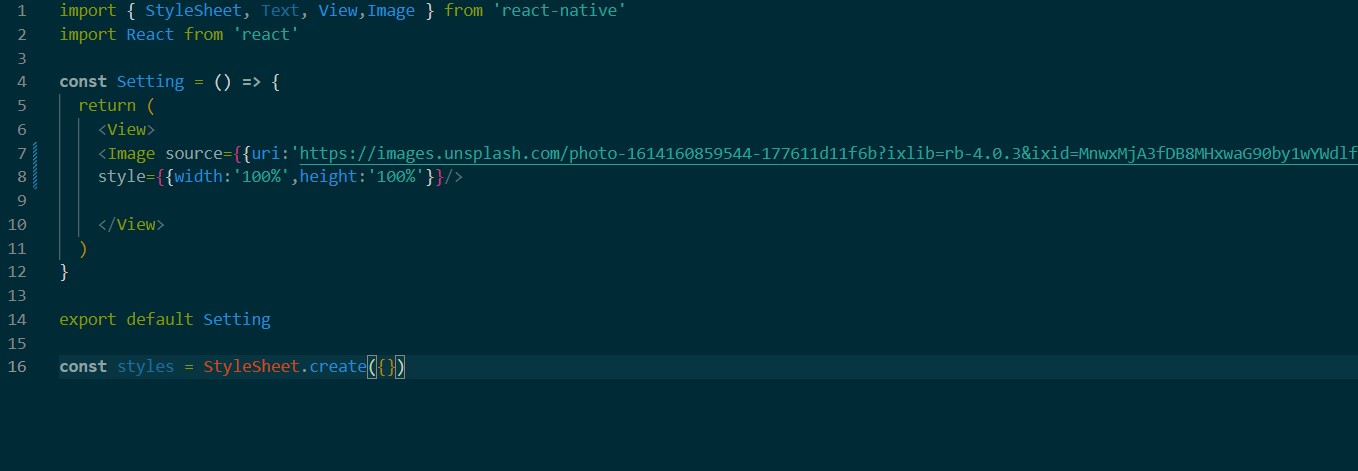
Image 3
The codebase for this file is the same as that of the two screens created above. Copy and paste it into this Setting.js file. Don’t forget to add a different image source and the name of the main component to ‘Setting’.
You don’t want to create the same screen as that of the About screen and Home screen. Do you? To give it a different look, change the image.
Creating the Material.js file
For this file, you have to create a separate file in your app folder and name it ‘Material.js’. It should not be in the ‘Component’ folder.
The entire code snippet for the Material.js file is shown in image 4.
Image 4
First, it imports the component that will be needed to create this file. These are StyleSheet, Text, View, and React. Also, it needs CreateMaterialTopTabNavigtor from @react-navigation/material-top-tabs.
It also imports the Home, About, and Setting components.
All three components are added on the Tab.Screen element.
The screenOptions is created with a definite background color of the tab bar.
Creating the App.js file
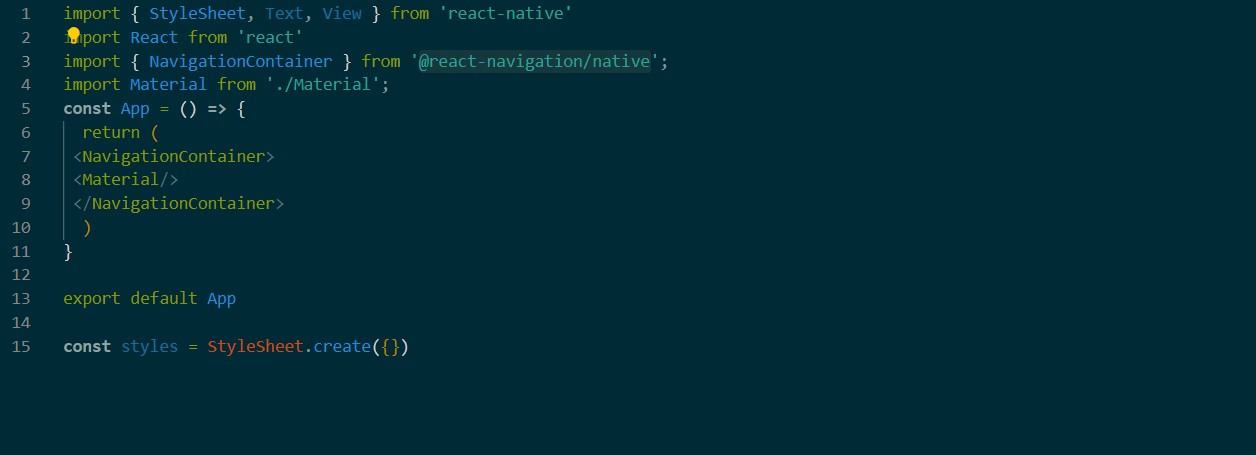
Image 5
App.js is referred to as the entry point for every React Native project. It presents the prime component of the app. Here, the App.js file renders the <Material/> component under the <NavigationalContainer> tag.
As we proceed forward in the last segment, we need to check if it is created as per the requirements.
Checking the program
In this step, we will check the code on a virtual device. Run the command prompt from our project folder. Run npm install and then npx react-native run-android on the command prompt. If you have followed the steps mentioned in this blog properly, you will get the output as shown in image 6.
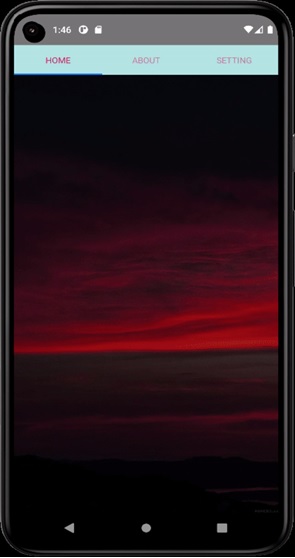
Image 6
You can navigate across the created screens from the top navigation panel. You can also swipe left to change the screens.